Flash Game Dev Tips Category
-
Flash Game Dev Tip #15 – Collectable Particles
30th Nov 20117
Tip #15 – Collectable Particles in Flixel
This tip was born from a question I see raised in the Flixel forums often: How do you use an FlxEmitter to emit more complex particles. I.e. ones that are animated or have their own logic, and how could a player interact with those particles?
We’ll solve this by creating a simple demo. In it you can fly a small ufo around a tilemap using the cursor keys. Where-ever you click with the mouse a burst of particles will be created, in this case an explosion of coins. If you fly into them you can collect them. By grabbing the source code and reading through this you should then be able to modify this approach for your own game.
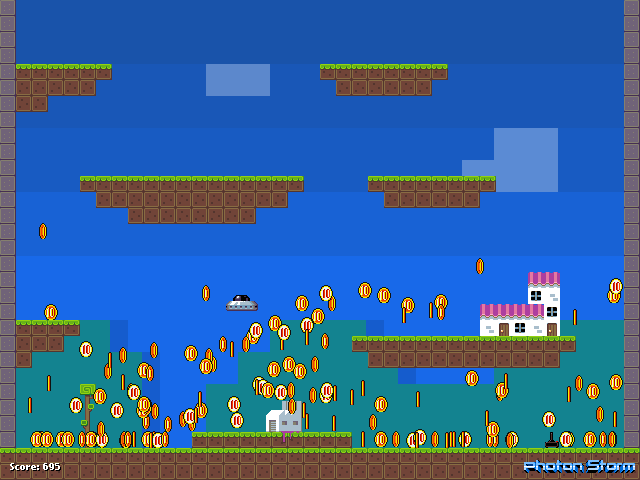
By the end it’ll look something like the above. Hit the jump for the full details, source code and example swf.
-
Flash Game Dev Tip #14 – How to create a Flixel plugin
1st Nov 2011
Tip #14 – How to create a Flixel plugin
When Adam created Flixel 2.5 he added support for plugins. Probably due to my constant harassing him on GTalk about it, but he did it all the same! And lots of my Flixel Power Tools take advantage of them. But it’s not always easy to know when you should be creating a plugin and what benefits you get from doing so. So here’s my guide to Flixel plugins. Along with a tutorial and playable demo on creating a plugin that makes a tinted mirror effect from any given FlxCamera that looks like this:

Where do plugins live?
Plugins live in the org.flixel.plugin package, which naturally maps to this folder:
org/flixel/pluginin your file system. You can create the class file either directly in here, or create your own folder inside “plugin” and then create your classes within that. This is a good way of avoiding naming conflicts with other plugins found online, so I’d recommend it.
Name your class file to match what the plugin does as best you can. Try not to be obscure. If the plugin is responsible for launching a wave of aliens then call it AlienWaveLaunch, so when you come back to your code later on, you know what it’s going to do before you’ve even opened the file. It’s common for Flixel plugins to have Flx at the start of their name, i.e. FlxAlienWaveLaunch, but this is not a technical requirement, so name it whatever you feel like.
The different types of plugin
A plugin can work in one of three ways:
- Registered Core Plugin – Automatically updated by Flixel every step
- Standard Class Plugin – Updated only when directly called in the game code
- Static Class Plugin – Typically offers utility methods
Which one you need is entirely up to your requirements. Here are some examples to help you differentiate between them:
-
Flash Game Dev Tip #13 – Building a retro platform game in Flixel, Part 2
21st Sep 2011
Tip 13: Building a retro platform game in Flixel, Part 2
Note: This tutorial was originally written for .net magazine. I’m now allowed to publish it here, so read on and enjoy! Part 1 is also available.
In the previous issue we took the open-source Flash game framework Flixel (www.flixel.org), and used it to create an 8-bit styled retro platform game. By the end of part 1 the player could run and jump around the scrolling level, collecting stars on the way. We covered a lot of ground and if possible you are urged to check out issue 218 and the associated downloads before diving into this part.
With the basics of the game in place it’s time to spice things up. We will add a title page to present the game, baddies to provide obstructions to the player, and mix it all up with suitably retro sounding chip music and sound effects. Please download the tutorial files and look through the source alongside reading the article, because for the sake of space not all code can be included in print.
Sprinkling a little Nutmeg
As with most things in life, first impressions are everything. If you don’t captivate the player within a few moments of your game, you are likely to lose them. This is especially true with games that are free to play online. As the choice is so wide you really need a compelling reason for them to stick around. A great title page can be a good way to achieve this. It should show them the name of your game, perhaps offer-up some of the key characters or themes, and be backed up with a short piece of music that fits the mood you’re trying to set.
Our game is called Nutmeg (a play on the title of this magazine) and our title page features the main character in a suitably jovial but dynamic pose, and the game logo.

Nutmeg is the title of our game. Our chirpy chick character defining the feeling we want to convey before the game has even started.
To really capture the feel of retro console games our title page will feature an attract mode. This term is taken from arcade machines that used to run short sequences of the game, to attract you to part with your 10p pieces. Our title page has been designed with a transparent background and aliasing so that it can be overlaid onto the game level which will scroll horizontally back and forth.
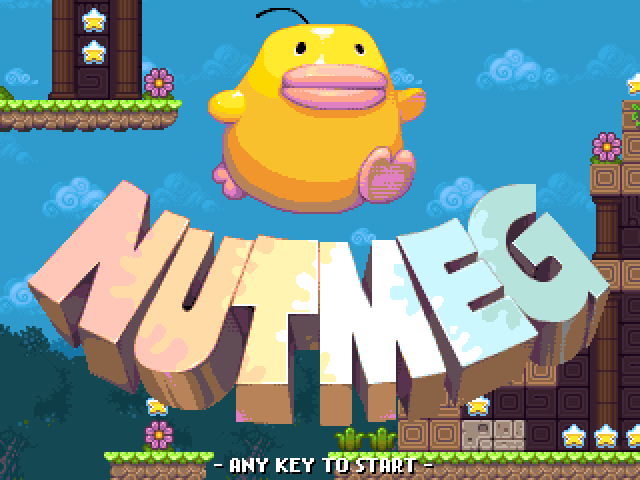
Our assembled title page. The background scrolls horizontally, showing off the level behind the logo.
To display the logo in an interesting way we’ll use one of the SpecialFX plugins from the Flixel Power Tools. First we activate the Special FX plugin and create an instance of it:
-
Flash Game Dev Tip #12 – Building a retro platform game in Flixel, Part 1
15th Sep 2011
Tip 12: Building a retro platform game in Flixel, Part 1
Note: This tutorial was originally written for .net magazine. I’m now allowed to publish it here, so read on and enjoy! Part 2 will follow next week.
Retro style games are becoming more popular than ever online. Commonly referred to as “8-bit” these games have pixel-art graphics and “chip tune” music that apes the consoles of old, but often have surprisingly innovative gameplay mechanics. And Flash has turned out to be the perfect tool for creating them, as hit titles like Canabalt and Fathom demonstrate.
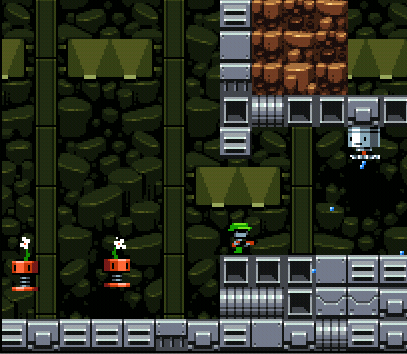
Fathom was one of the first games built with Flixel and is a good example of what it can do.
This may seem at odds with a technology known for its vector graphics and timeline animation. But under the hood Flash is perfectly capable of pushing around large volumes of pixels which is exactly what is required. Flixel is a game framework born from a desire to create 8-bit style games. But it has evolved into a powerful way to rapidly create games in Flash. With a strong community and plug-ins available it’s the perfect choice to create our game with. In this two part series we’ll explore how Flixel works and build a retro-styled platform game in the process.
Download the tutorial files and look through the source code alongside reading the article, because for the sake of space not all of it can be covered here and we’ve got a lot of ground to cover.
-
Flash Game Dev Tip #11 – The Flixel Display List Explained
18th Aug 2011
Tip #11 – The Flixel Display List Explained
This question comes up on the flixel forums so often that I feel it warrants a post of all its own. Flixel 2.5 changed the way in which the game is rendered. And it’s important to know the order of the display objects if you ever want to do anything such as insert a 3rd party API like Flint, or display the Flixel mouse cursor on-top of a Mochi leaderboard.
Flixel Display Objects != Display Objects
If you are familiar with Flash then you’ll know about Display Objects and how using addChild() allows you to parent them for easy grouping. Flixel uses native Display Objects but only for a few key elements. The following illustration explains the parenting involved:
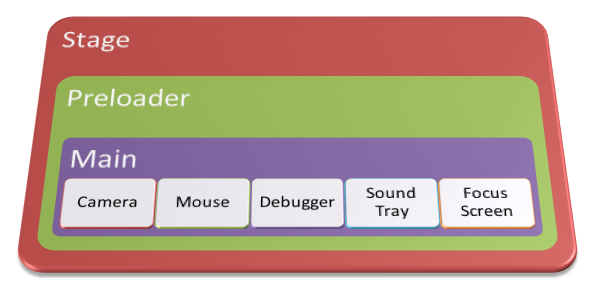
Stage is the root of your SWF and parent of all Display Objects. It will contain your Preloader which itself usually extends a Sprite or MovieClip. This in turn contains Main which in most cases extends FlxGame, which is a Sprite.
If you are utterly lost at this point because you don’t know how the Flash Display List works then I’d strongly recommend reading Chapter 6 of the AS3 Cookbook. The whole chapter is free to read on-line, so there’s no excuse! Come back once you’ve sussed it.
In terms of Flash Display Objects your FlxGame is usually 2 levels deep. But here is where it starts getting interesting. A default Flixel 2.5 game will create the following 5 Display Objects, all of them Sprites, in this order:
- Camera
- Mouse
- Debugger
- Sound Tray
- Focus Screen
If you set forceDebugger = false then the Debugger will not be there, but generally these are your 5 main objects.
The way Flixel works is that a new Sprite is created for every Camera in your game. If you create 2 new cameras then they appear at the top of the list above, with the Mouse, etc following.
The Camera has its own Buffer, which is a Bitmap and a BitmapData into which the game is rendered. So if you have say 20 FlxSprites all zooming around a nice FlxTileMap world, all of that is rendered down to one single Bitmap stored in the Camera buffer.
Hire Us
All about Photon Storm and our
HTML5 game development services
Recent Posts
OurGames
Filter our Content
- ActionScript3
- Art
- Cool Links
- Demoscene
- Flash Game Dev Tips
- Game Development
- Gaming
- Geek Shopping
- HTML5
- In the Media
- Phaser
- Phaser 3
- Projects
Brain Food

