Posts Tagged ‘enemy’
-
Flash Game Dev Tip #8 – Building a Shoot-em-up Part 3 – Return Fire
5th Apr 201119
Tip #8 – Flixel – Building a Shoot-em-up, Part 3 – Return Fire
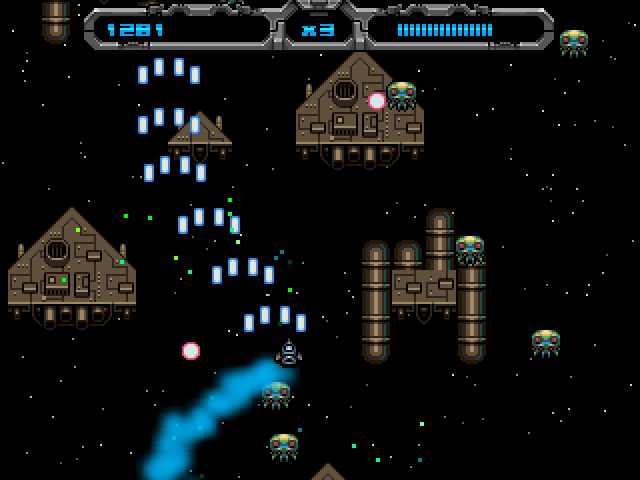
This tip follows-on from Tip #4, where we added enemies and explosions into our game. But it was a little one-sided. This time the enemy are going to shoot back. And you’ll feel it, by way of a health bar and set of lives in our new HUD. Finally we’ll drop in the scrolling tile-map background and simple menu / game-over states. By the end it will look like this:

Note: I’ve embedded the game at the bottom of the tip.
Return Fire
Last time we added the Enemy Manager, which spawned a regular supply of enemies at us. Each enemy had a launch function which set it moving. Let’s add the ability to fire to that:
//	Will they shoot at the player? 70% chance of doing so
if (FlxMath.chanceRoll(70))
{
	willFire = true;
	fireTime = new FlxDelay(1000 + int(Math.random() * 500));
	fireTime.start();
}
This uses a new FlxMath function chanceRoll. The enemy has a 70% chance of firing at you. If this happens we create a new FlxDelay Timer of 1 second + up to an extra 0.5 second, and start it running.
Then in the Enemy update function we check that timer:
if (willFire && fireTime.hasExpired)
{
	Registry.enemyBullets.fire(x, y);
	willFire = false;
}
As you can see, this is calling the fire function in our Enemy Bullet Manager, passing in the x/y coordinates of the Enemy, which launches a bullet from the bullet pool:
public function fire(bx:int, by:int):void
{
	x = bx;
	y = by;

	FlxVelocity.moveTowardsObject(this, Registry.player, speed);

	exists = true;
}
FlxVelocity tells the bullet (this) to move towards the player at the value of speed (which in our case is 240 pixels per second).
-
Flash Game Dev Tip #4 – Bullet Manager Part 2
5th Mar 2011
Tip #4 – Flixel – Bullet Manager Part 2
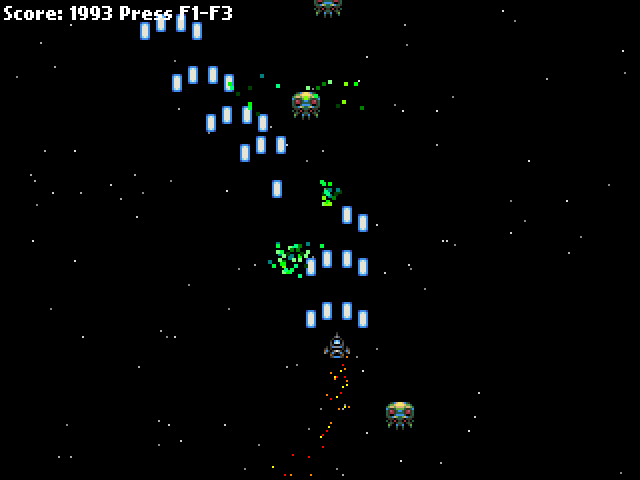
This tip follows-on from Tip #3, where we got a player controlled space-ship up, and had it fire all kinds of bullet death. In this tip we’re going to add something to use those bullets on – an Enemy manager, and a particle effect for when they are shot. By the end it’ll look like this:

Enemy Manager
As with the bullets in the previous tip we are going to create an Enemy Manager. This class will be responsible for creating a pool of enemies, launching them and recycling them when killed.
package
{
	import org.flixel.*;
	import flash.utils.getTimer;

	public class EnemyManager extends FlxGroup
	{
		private var lastReleased:int;
		private var releaseRate:int = 500;

		public function EnemyManager()
		{
			super();

			for (var i:int = 0; i < 100; i++)
			{
				add(new Enemy);
			}
		}

		public function release():void
		{
			var enemy:Enemy = Enemy(getFirstAvail());

			if (enemy)
			{
				enemy.launch();
			}
		}

		override public function update():void
		{
			super.update();

			if (getTimer() > lastReleased + releaseRate)
			{
				lastReleased = getTimer();

				release();
			}
		}

		public function bulletHitEnemy(bullet:FlxObject, enemy:FlxObject):void
		{
			bullet.kill();

			enemy.hurt(1);

			Registry.fx.explodeBlock(enemy.x, enemy.y);

			FlxG.score += 1;
		}

	}

}
Our Enemy Manager works identically to the Bullet Manager from before. It starts by creating a pool of 100 enemies, which I admit is probably 90 more than we actually need at this stage of the game! Enemies are just extensions of an FlxSprite, and by default they have their exists value set to false, so they are free for allocation by the manager.
The manager overrides the flixel update function. All we do in there is check the value of the timer. getTimer() is a Flash utility class that gives you the number of milliseconds since the SWF started playing. It’s a really good way of timing things without having to use Timer Events, as it’s just integer based, fast and pretty accurate.
Our releaseRate is set to 500. That’s in milliseconds, so 500 would be every half a second (1000 ms per second). If enough time has elapsed we release a new enemy. This simply pull the next available enemy from the pool and call its launch function.
The enemy class looks like this:
package
{
	import org.flixel.*;

	public class Enemy extends FlxSprite
	{
		[Embed(source = '../assets/space-baddie.png')] private var enemyPNG:Class;

		public function Enemy()
		{
			super(0, 0, enemyPNG);

			exists = false;
		}

		public function launch():void
		{
			x = 64 + int(Math.random() * (FlxG.width - 128));
			y = -16;
			velocity.x = -50 + int(Math.random() * 100);
			velocity.y = 100;

			health = 4;
			exists = true;
		}

		override public function kill():void
		{
			super.kill();

			FlxG.score += 20;
		}

		override public function update():void
		{
			super.update();

			if (y > FlxG.height)
			{
				exists = false;
			}
		}

	}

}
We extend an FlxSprite but make two significant changes.
3, 2, 1, Launch!
The code in the Enemy launch function does two things. 1) It places the enemy at a random x coordinate, and just off the top of the screen, with a random x velocity. And 2) it resets its health to 4 and tells flixel it now exists.
By giving it 4 health it means it’ll take 4 shots to kill the alien.
We also override the kill function to give the player + 20 points to their score once the alien is dead.
The final small change is in the update function. If the alien flies off the bottom of the screen, we set its exists to false. If we didn’t do this it’d just carry on flying down into game space, where the player will never see it, and eventually our pool would run out of aliens to launch.
Collision
Our PlayState.as class has been expanded ever so slightly from last time. It now includes the enemies on the flixel display list, and the fx class which we’ll cover in a moment.
Crucially in the update function we run a collision check:
FlxU.overlap(Registry.bullets, Registry.enemies, Registry.enemies.bulletHitEnemy);FlxU is the flixel general utilities class. And one of those utilities is called “overlap” which will tell us if any two objects are overlapping. The parameters you pass are the two objects to test and a function to call if the overlap is true.
You can pass in whole groups of objects, which is what we do in this case. We’re asking flixel to check all bullets in the bullets group, against all enemies in the enemies group. And if it finds an overlap from two “alive” (existing) objects it will call the bulletHitEnemy function inside the Enemy Manager class.
The code for this function can be seen above, but it works by taking the 2 objects as parameters (in the order in which you define them in the overlap call, so in our case bullet first and enemy second.
In this game bullets can only hit once. So we call
bullet.kill();which will remove the bullet from the screen, and free it up ready for use again by the bullet manager.
The alien however is a little more robust. Remember we set it to have a health of 4? So when it gets shot we’ll “hurt” it by 1. Flixel objects have a hurt() method, which when called will reduce the objects health variable by the amount given:
enemy.hurt(1);In this instance we’ll “hurt” it by 1. Perhaps if the player was using super-bullets we could hurt it by 4, which would kill it instantly. Flixel will minus this amount from the health of the alien, and if its equal to zero it then calls kill on the object. As we over-rode the kill() method in Enemy.as we know the result of this is that the player gets 20 points added to their score.
After the bullet has been removed, and the alien hurt, we unleash a particle effect and increase the players score by 1. So for every bullet that hits an alien their score increases by 1, and a small particle shower happens.
The particle effect is controlled by the Fx class. When the alien is hit we call:
Registry.fx.explodeBlock(enemy.x, enemy.y);Our explodeBlock function takes 2 parameters, and x and a y value which it uses to control where to start the explosion effect.
Boom, shake the room
The Fx class is responsible for controlling our FlxEmitters. In the world of flixel these are objects capable of emitting a series of FlxSprites with pre-defined velocity, rotation and gravity. Basically, you can make pretty particle effects using them.
Our Fx class creates a pool of 40 FlxEmitters and puts them into an FlxGroup. Every emitter is the same.
It also creates one more emitter called jets. This is used to create the jets trail that comes from the back of the players space ship.
In the Fx class we over-ride the update function and use it to position the jets at the x/y coordinates of the player:
jet.x = Registry.player.x + 4;
jet.y = Registry.player.y + 12;
The +4 and +12 values are just to position the emitter into the correct place, so it looks like it is coming from the back of the ship rather than the top left (the default x/y origin).
As you can see, having access to the player via the Registry is extremely handy here (see Tip #1 if you don’t know what the Registry is)
The explodeBlock function is the one that launches the particle shower when an alien is shot. It’s extremely simple:
public function explodeBlock(ax:int, ay:int):void
{
	var pixel:FlxEmitter = FlxEmitter(pixels.getFirstAvail());

	if (pixel)
	{
		pixel.x = ax;
		pixel.y = ay;
		pixel.start(true);
	}
}
It just gets a new emitter from the pool (if there is one available), places it into the correct x/y location for where the bullet hit the alien, and starts it running. The true parameter tells the emitter this is an explosion, so all of the particles will be fired out at once rather than bursting continuously.
Download
With just a few extra classes our game has now come on quite a way. We’ve got aliens that fly down at you, bullets that can blow them to shreds, a nice particle trail following the ship and a pretty explosion for when things go boom. All in very few lines of hopefully easy to follow code.
In the next tip I’ll make the enemies fire back at you, give you a health bar and a number of lives. We’ll then add a scrolling tilemap background to really elevate things.
Download the source code and SWF from the Flash Game Dev Tips Google Code Project page.
Hire Us
All about Photon Storm and our
HTML5 game development services
Recent Posts
OurGames
Filter our Content
- ActionScript3
- Art
- Cool Links
- Demoscene
- Flash Game Dev Tips
- Game Development
- Gaming
- Geek Shopping
- HTML5
- In the Media
- Phaser
- Phaser 3
- Projects
Brain Food


