Flash Game Dev Tip #13 – Building a retro platform game in Flixel, Part 2

Tip 13: Building a retro platform game in Flixel, Part 2
Note: This tutorial was originally written for .net magazine. I’m now allowed to publish it here, so read on and enjoy! Part 1 is also available.
In the previous issue we took the open-source Flash game framework Flixel (www.flixel.org), and used it to create an 8-bit styled retro platform game. By the end of part 1 the player could run and jump around the scrolling level, collecting stars on the way. We covered a lot of ground and if possible you are urged to check out issue 218 and the associated downloads before diving into this part.
With the basics of the game in place it’s time to spice things up. We will add a title page to present the game, baddies to provide obstructions to the player, and mix it all up with suitably retro sounding chip music and sound effects. Please download the tutorial files and look through the source alongside reading the article, because for the sake of space not all code can be included in print.
Sprinkling a little Nutmeg
As with most things in life, first impressions are everything. If you don’t captivate the player within a few moments of your game, you are likely to lose them. This is especially true with games that are free to play online. As the choice is so wide you really need a compelling reason for them to stick around. A great title page can be a good way to achieve this. It should show them the name of your game, perhaps offer-up some of the key characters or themes, and be backed up with a short piece of music that fits the mood you’re trying to set.
Our game is called Nutmeg (a play on the title of this magazine) and our title page features the main character in a suitably jovial but dynamic pose, and the game logo.
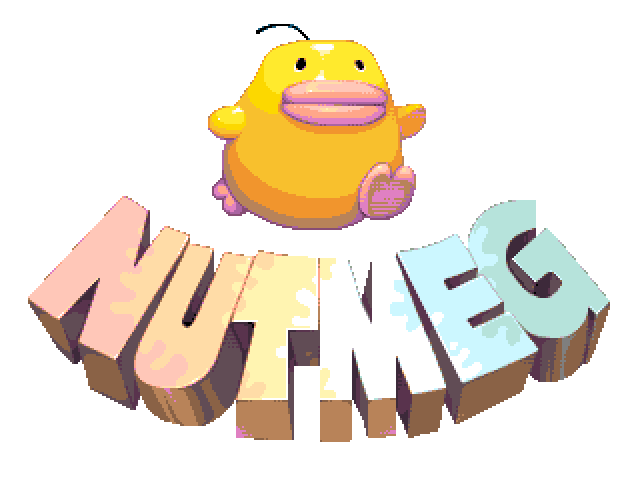
Nutmeg is the title of our game. Our chirpy chick character defining the feeling we want to convey before the game has even started.
To really capture the feel of retro console games our title page will feature an attract mode. This term is taken from arcade machines that used to run short sequences of the game, to attract you to part with your 10p pieces. Our title page has been designed with a transparent background and aliasing so that it can be overlaid onto the game level which will scroll horizontally back and forth.
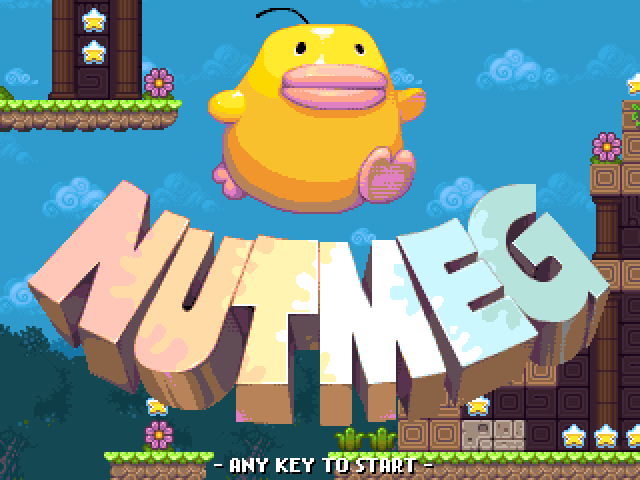
Our assembled title page. The background scrolls horizontally, showing off the level behind the logo.
To display the logo in an interesting way we’ll use one of the SpecialFX plugins from the Flixel Power Tools. First we activate the Special FX plugin and create an instance of it:
[as]
if (FlxG.getPlugin(FlxSpecialFX) == null) {
FlxG.addPlugin(new FlxSpecialFX);
}
floodfill = FlxSpecialFX.floodFill();
[/as]
We create a new effect storing the result into an FlxSprite called title. This is added for display.
[as]
title = floodfill.createFromClass(titlePagePNG, 0, 0, 320, 240);
title.scrollFactor.x = 0;
title.scrollFactor.y = 0;
[/as]
A call to floodfille.start() will set the effect running. This will gradually build up the title page line by line, and is a nice way to reveal the logo. The scrollFactor commands tell Flixel not to scroll the logo as the camera pans across the level, it keeps it in a fixed position on the screen. The final element is to let the user leave the menu and start the game. So in the main update loop we check for a key press:
[as]
if (FlxG.keys.any()) {
FlxG.fade(0xff000000, 2, changeState);
FlxG.music.fadeOut(2);
}
[/as]
Once a key is pressed both the title page and music are faded out over a duration of 2 seconds. At the end of this we switch state to the game itself.
Pink, square and evil felines
In the original concept artwork for the game the artist drew a square shaped cat-like creature that would act as a “baddie” against the player. They may look cute and harmless, but get close and you’ll be reset to the start of the level. In real old-school games you would also lose a life. Lose too many and it’d be game over. But modern gamers, especially those enjoying a quick “casual” game on their lunch break, don’t expect such harsh conditions, so we’ll leave it out.
Our artist took the baddie sketch and created a 2-frame sprite sheet from it. It’s a simple jumping motion that the cats will use as they prowl around the level.
We start by creating a class called Cat which extends FlxSprite. After loading the PNG sprite sheet and creating an animation, we set the cat off roaming the land by giving it a horizontal velocity:
[as]velocity.x = 30;[/as]
This makes the cat move, but it will also walk off the edge of platforms. While this may look amusing it isn’t desirable behaviour. To prevent it we put this check into its update function:
[as]
if (isTouching(FlxObject.FLOOR) == false) {
if (facing == FlxObject.RIGHT) {
facing = FlxObject.LEFT;
velocity.x = -30;
} else {
facing = FlxObject.RIGHT;
velocity.x = 30;
}
}
[/as]
With this in place the cat will walk to the edge of a platform as before, but if it suddenly detects there is no longer any floor beneath it, it will instantly turn around and go back in the opposite direction.
On the head
Now the cats can walk around we’ll add a collision check into our PlayState update function. This will test to see if the player has hit any of the cats in the level:
[as]FlxG.overlap(player, level.cats, hitCat);[/as]
If an overlap occurs it calls the function hitCat. In the Mario games Nintendo’s chief mascot is capable of head-stomping on baddies in order to kill them. In the older Mario games all the Nintendo developers did was check the Y axis value of the two colliding sprites. If Mario was higher than his opponent that was it – the opponent was stomped. In modern Mario games there is much more physics involved, and you have to hit the opponents with a great degree of force like a tactical strike. We’re going to implement the simpler and kinder “old” head-stomp method. In the hitCat function we check the Y values:
[as]
private function hitCat(player:FlxObject, cat:FlxObject):void {
if (player.y < cat.y) {
cat.kill();
} else {
player.reset();
}
}
[/as]
If the player is above the cat, the cats kill method is called. Otherwise the player is reset. In Flixel sprites have in-built functions called kill which remove them from the game. They are no longer processed or rendered, which is an ideal function to hook into for our cats.
The reset function will force the player back to the starting x/y coordinates of the level. Because our test level is short we can get away with doing this. If you were designing bigger levels then you should use a checkpoint system: When a player passes or activates a checkpoint this is stored in a local variable. And when reset is called the player is returned to the closest checkpoint rather than the beginning. With the cats in and on patrol it’s time to add some sound to our until-now silent game.
Pitter Patter, Boing, Meeow, Donk!
Sound effects in games are used to highlight key events. Now we have the ability to jump on the heads of baddies we can play a suitable cat like “donk!” noise when this happens. Sound effects will also be used to punctuate the players actions: running (the pitter-patter of tiny chick feet), jumping, a springy zoing effect, getting hurt and collecting a star. The effects are to be played over the top of the background music, and were created with that in mind – so they blend with the style of the music and don’t sound too jaring, but equally don’t get lost either.
When using Flex SDK to compile you can embed sound effects in the same way you embed graphics images. MP3 files are the best supported and the most efficient in terms of file size. When preparing your sound effects don’t forget to convert them to mono, and lower the bit rate. A rate of 96KHz is usually plenty. With the effects converted and embedded Flixel can play them with one command:
[as]FlxG.play(catHitSFX, 0.5, false, true);[/as]
catHitSFX is the class name of the embedded sound effect. 0.5 controls the volume at which the effect is played. Often these should be normalised along with the game music, but if you need to fine-tune you can pass a volume value between 0 and 1. The final two parameters set of the sound is looped or not and if Flixel should destroy the instance of the sound once it completes. As this is our “cat death” noise, we set that to true to stop memory building up. For effects which are used over and over such as the player running and jumping, we would tell Flixel to keep the effect resident to avoid re-creating it every time it is played. All of the sound effects in the game are played in the same way.
And then there was music
To give Nutmeg an authentic retro audio vibe we enlisted the musical talents of Brendan Ratliff. A life-long musician and composer of game, film and tv soundtracks he is particularly skilled in a style known as “chip music”. As we’re creating a retro infused game, it’s only fitting that we have a soundtrack that sounds like it is being played on the gaming hardware of the 90s. You will find an mp3 of the game music in the tutorial downloads zip. Brendan explains how he set about creating the in-game music: “The pace of the game is probably the first thing I try to establish, keeping in mind the game’s difficulty level and how annoying the music might get on the 1000th repeat. Instrumentation is also a balancing act, whereby I allow aesthetics and narrative context to guide me some of the way in keeping with players’ expectations – right down to the obvious clichés like wobbly organ lines in grim minor keys when the player reaches the Scary Castle level, but then contrive a few surprises to keep things original. Also, I’m a sucker for cheesy ’80s style key-changes; great for giving the player a feel-good motivational boost when they’re in a dead end. It’s important not to absolutely dominate things with earth-shattering basslines and loud, piercing synth leads, but nor should you be too timid: a confident little melody which is given space for development will slowly work its way into the player’s head until they walk away humming it, à la Super Mario Bros. for the NES. If you get it right, the player’s brain does your job for you and turns your modest few minutes of music into something epic and sweeping while they play for hours on end – Tetris on the Game Boy, anyone?”
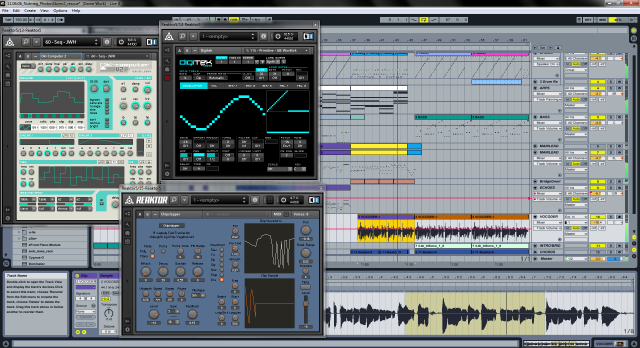
Making sweet music. The Nutmeg soundtrack, composed on an Amiga then exported to PC where it's spruced up in Ableton Live using the Reaktor plugins.
Making it loop seamlessly
Playing music in Flixel is just as easy as playing sound effects:
[as]FlxG.playMusic(titleMusicMP3, 1);[/as]
The 1 parameter controls the volume and the music is set to loop automatically. If you need a seamless (gapless) playback then this is actually very hard to achieve in normal ActionScript3 code. By default mp3 files embedded into Flash typically suffer from a moments “pause” as they restart. This abrupt period of silence is enough to cause the human ear to question what they heard, and it spoils the “gapless” effect required. At the moment the most foolproof way to get around this is to use the Flash Professional IDE to package the music. Open the IDE, create a new blank AS3 project and then drag all of the sound files you need into the Library. As you’re using the IDE you can put the high quality files in here in any format Flash supports (WAV, MP3, etc). Make sure you give each file a Linkage value. For example in the code above the linkage value was “titleMusicMP3”. Go to the Publish Settings window and enable “Export SWC”, set the desired bit rate and hit Publish. In Flash CS5.5 you have the new ability to export just the SWC file, but in CS5 or lower it will publish both an SWC and a SWF file. You can disregard the SWF as it’s just the SWC we need.

Publishing the Nutmeg audio files to an SWC for linking into the main game project. It's the only way to ensure true gapless playback.
The resulting SWC file should be copied into the lib folder of your FlashDevelop project. In FlashDevelop, right-click on the SWC in the Project window and select “Add to Library”. The file will change colour and you will also notice that all of the Linkage values you set earlier will now be available during auto-complete prompts while coding. This may seem like a convoluted method to get some music in your game, but if you need truly gapless playback it’s the only reliable one at present. If your music naturally comes to an end and has silence before restarting, you can skip this step and just embed it like any other asset.
Code for playing the music is added into both the MainMenuState and the PlayState. The music for the main menu being a much shorter piece, composed specifically to set the scene, using key hooks and sounds from the longer more progression in-game music. With everything sounding great Brendan offers this final piece of advice if you fancy composing rather than coding: “Like with any other discipline, there’s no substitute for practice, even if you’re just starting out. Download one of the many free trackers (e.g. http://milkytracker.org) or the free, fully-functional demos of apps like http://renoise.com and http://reaper.fm, then start messing about with tutorial projects and free plugins until you’ve got something that pleases the ear. And whenever you’re not composing be listening to music – all sorts of music, especially stuff that expands your horizons. The chipmusic scene can look broad and fragmented, but it’s actually quite a tight-knit community full of helpful people. Take a look at http://chipmusic.org, http://8bc.org and http://truechiptilldeath.com to get the widest spread of what’s on offer in terms of software, technique, subgenres and live music in your area”
Game Over Man, Game Over!
We have taken the game and added a title page, baddies, suitable music, sound effects and the ability to complete the level. All that is left to do is package it up in such a way that it can be easily uploaded to games portals.
Once you are happy with the game be sure to set FlashDevelop / Flash Builder to compile it into “Release Mode”. This strips away all of the debug information that Flex SDK compiles into SWF files as standard. Your SWF will be a smaller file as a result, in this case it shaved approx. 150KB from the size. And it will run faster when played on the web, as it isn’t processing debug information internally.
The single SWF file contains everything, and you can now upload it either to a games portal such as Kongregate (http://www.kongregate.com), or for sale on a site like Flash Game License (http://www.flashgamelicense.com). If your game is a real hit with the players you will find that it spreads virally. Being a single SWF file it’s easy for this to happen, and there are lots of sites who actively monitor places like Kongregate and take and re-host the top performing games. If you’ve built your game specifically for a client, this is a good thing and to be encouraged.
Good luck with your Flixel game making endeavours. Don’t forget to drop by the forums at http://forums.flixel.org if you’d like advice, or just want to show-off your latest creation. Feel free to follow me on twitter @photonstorm for lots of game dev geek chatter and Aardman news.
The following 2 sections appeared as “box-outs” around the main article. I’m including them here for completeness, and because they’re cool 🙂
Brendan Ratliff / Echo Level talks about creating authentic chip music
My mainstays for chipmusic on the Commodore Amiga are Protracker and AHX – the latter being a less well-known but brilliant tracker which vaguely mimics the Commodore 64 SID sound, but with a lot of unique features. I also use FastTracker2 (or Milkytracker – its modern, multiplatform clone) for more complex pieces, and when composing for games I usually blend oldschool techniques with modern software like Renoise (a great tracker-style DAW), Ableton Live and some VST plugins. I love the oldschool music module formats, but these days people’s ears are accustomed to a more professional ‘shine’ so I tend to apply a mastering effects chain to rendered versions.
When I perform my chipmusic live, I mute all the lead melodies in my songs and play them on a Roland SH-101 analogue synth – usually in keytar mode for full poseur value! Recently, I’ve been doing a lot of composing with the aid of a free HTML5 tool I created (http://tunealiser.co.uk), which can be used to visually sketch up a composition along a timeline, or to load in YouTube / Vimeo / Soundcloud media and make timelined annotations.
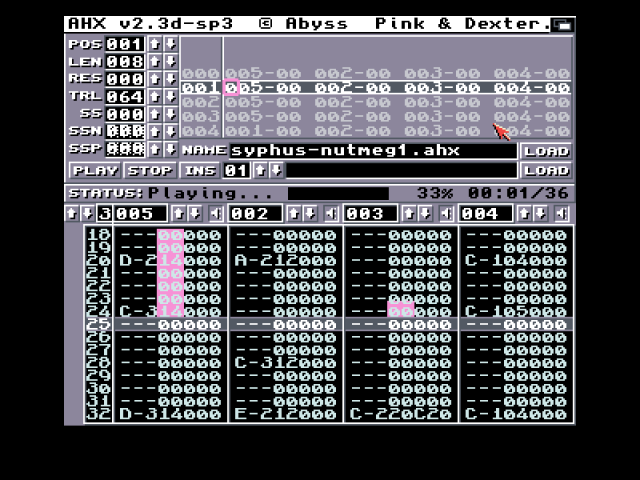
AHX Tracker running on an Amiga - If you want a true chipmusic sound to complement your retro game, then it doesn't get much more authentic than using proper "retro" hardware and software
As for musical inspiration right now I can’t stop listening to 4mat’s brilliant album ‘Decades’ from last year (http://4mat.bandcamp.com/album/decades). 4mat and a few contemporaries coined the term ‘chiptune’ back in around 1988 to describe their filesize-limited Amiga music – which in turn was intended to mimic earlier C64 sounds. 4mat has been composing music in the demoscene and commercially for video games ever since. New and amazing stuff is constantly appearing, though, so I could never commit to having a ‘favourite’. If you are on the look-out for authentic chipmusic to go with a game then definitely keep an eye on the True Chip Til Death (http://truechiptilldeath.com/) RSS and Twitter feeds for all the latest composers! Then try contacting the musicians directly to negotiate rights or procure audio services.
For chip style game sound effects have a play on http://www.bfxr.net where you can create and save them, copyright free.
Listen to Brendan’s music at http://www.echolevel.co.uk
Making money from your Flash game
As well as creating Flash games for clients there are other ways to monetise them. The two most common methods are implementing an advertising API, and having it sponsored by one or more games portals.
Adverts in Flash games work much the same way as Google AdWords do on web sites. You get paid based on the number of impressions and CTR rate. Very successful games can earn a significant regular monthly income from this revenue stream alone. One of the biggest advertising networks for games is Mochi Media (http://www.mochimedia.com). As well as offering a range of useful tools for game developers, including analytics, leaderboards and achievements, they also have a comprehensive advertising API. Payments are made monthly by PayPal and getting started is only a few minutes work. Advertising income is also offered on some of the larger games portals. For example uploading your game to Kongregate (http://www.kongregate.com) will allow you to participate in their revenue share scheme. While it’s rare for developers to “get rich” off adverts alone, they’re an easy way to add a little extra income to your bank balance each money.

Flash Game License is a site where Flash game developers and sponsors go to exchange games for hard cash. Nearly $8 million dollars worth over the past few years.
Getting your game sponsored by a games portal is a much more direct and less risky route to income. Flash Game License (FGL) (http://www.flashgamelicense.com) is a marketplace for game developers and portals alike to broker deals. As a developer you upload your game, where the portals logging into FGL can play it. If they like what they see they will make a bid on it. You collect bids from interested parties, weigh-up the pro’s and con’s of each, as the terms often vary, and then pick the sponsor most suitable for your game. It’s not unusual to be able to sell one game to many portals, and the top games can fetch in excess of $5000.
Flash Game License have an active community of game developers, so it’s a friendly place to hang-out during development as well as during the bidding process. Their FGLopedia contains lots of information about the different sponsorship types and is well worth thumbing through.
Posted on September 21st 2011 at 2:14 pm by Rich.
View more posts in Flash Game Dev Tips. Follow responses via the RSS 2.0 feed.
Make yourself heard
Hire Us
All about Photon Storm and our
HTML5 game development services
Recent Posts
OurGames
Filter our Content
- ActionScript3
- Art
- Cool Links
- Demoscene
- Flash Game Dev Tips
- Game Development
- Gaming
- Geek Shopping
- HTML5
- In the Media
- Phaser
- Phaser 3
- Projects
Brain Food


