Get a Google Nexus One working on Windows 7 for Android Development
Today our Google Nexus One developer handset arrived at work. We bought it to do some prototype work with the Flash CS 5.5 pre-release (AIR 2.6) to allow for a much quicker development work flow. Due to the obvious Adobe NDA I can’t talk about the 5.5 feature set, but what I can say is what a complete and utter ball-ache it was to get the phone working on Windows 7, and how I finally got around it, in the hope that one day this may save some other poor sod from wasting hours like I did.
The problem
Plug your Nexus One into a Windows 7 PC and it won’t work. The device drivers install and then fail. So you can’t mount it and USB debugging doesn’t do anything (obviously).
The issue
The USB drivers aren’t Windows 7 compatible!
The solution
1) You need to download the Android SDK for Windows and install it. I used the r08 release as it was the most current at the time of writing. It’s available from http://developer.android.com/sdk/
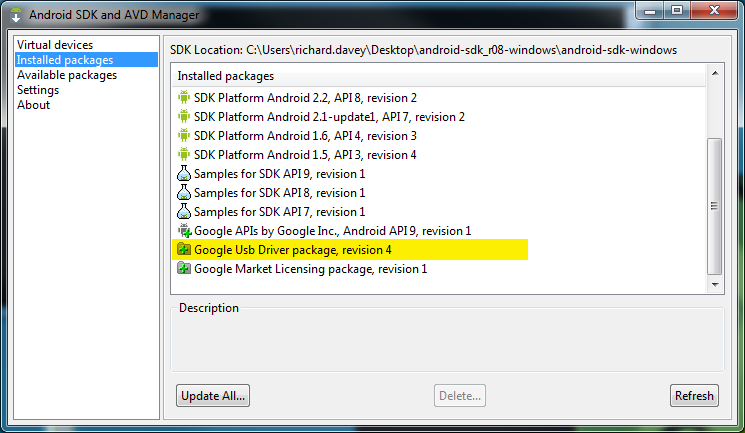
2) Once installed run the SDK Manager and let it do all the Updates that it requires. When finished click on Available packages on the left and then expand the Third party Add-ons entry on the right. Below this you’ll see Google Inc. add-ones. Expand that and lo and behold is the Google Usb Driver package (at the time of writing it’s revision 4). Tick it and click Install Selected. When complete you should see it on the Installed packages list:
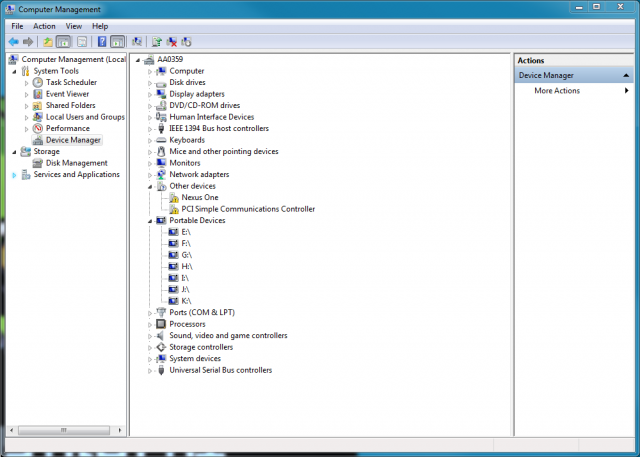
3) Now go into the Computer Management app. In Windows 7 you can right-click your Computer icon on your Desktop and pick “Manage”. You need administrator level permissions to do this. Pick Device Manager on the left and you should see your Nexus One listed under “Other devices” on the right,with a little yellow alert sign over the icon:
4) Right-click the Nexus One entry and pick Install Driver. It will ask if you wish to Search for the driver or Browse for it. Naturally you need to browse for it. Point it at the google-usb_driver folder that is now inside your Android SDK folder. The location of this will vary from PC to PC, but I’m hoping you know where you unzipped it all 🙂
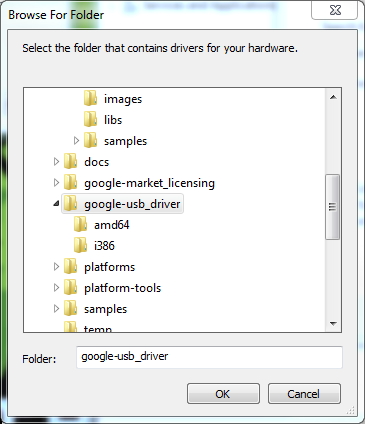
The driver will now install. I did this with the phone connected and it didn’t seem to complain at all.
At the end of the process you should see this:

Click Close and the Device Manager will refresh. Voila! We can haz Nexuses:
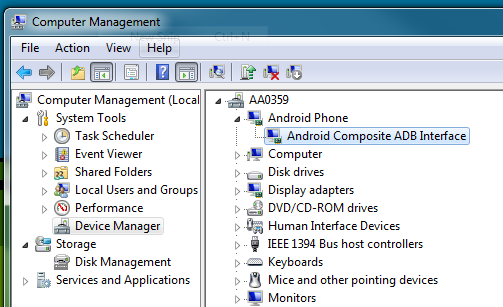
From this point on you mount the phone and access it like a normal USB stick. It will make your life in Flash a whole lot easier now too! No more crappy slow emulators 🙂
The small tests I’ve run on the phone so far look promising. Speed is still a bit of an issue, but I believe we can get around that with some clever optimisation and planning. There’s a good beginners guide written by Terry Paton on the Mochi web site.
Posted on January 17th 2011 at 6:35 pm by Rich.
View more posts in Game Development. Follow responses via the RSS 2.0 feed.
Make yourself heard
Hire Us
All about Photon Storm and our
HTML5 game development services
Recent Posts
OurGames
Filter our Content
- ActionScript3
- Art
- Cool Links
- Demoscene
- Flash Game Dev Tips
- Game Development
- Gaming
- Geek Shopping
- HTML5
- In the Media
- Phaser
- Phaser 3
- Projects
Brain Food

