Flash Game Dev Tip #12 – Building a retro platform game in Flixel, Part 1

Tip 12: Building a retro platform game in Flixel, Part 1
Note: This tutorial was originally written for .net magazine. I’m now allowed to publish it here, so read on and enjoy! Part 2 will follow next week.
Retro style games are becoming more popular than ever online. Commonly referred to as “8-bit” these games have pixel-art graphics and “chip tune” music that apes the consoles of old, but often have surprisingly innovative gameplay mechanics. And Flash has turned out to be the perfect tool for creating them, as hit titles like Canabalt and Fathom demonstrate.

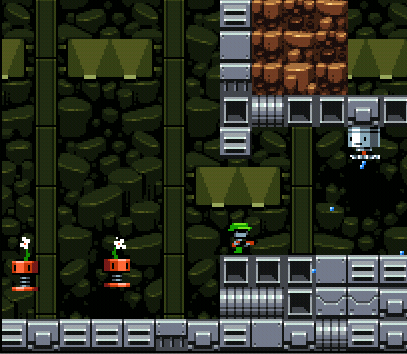
Fathom was one of the first games built with Flixel and is a good example of what it can do.
This may seem at odds with a technology known for its vector graphics and timeline animation. But under the hood Flash is perfectly capable of pushing around large volumes of pixels which is exactly what is required. Flixel is a game framework born from a desire to create 8-bit style games. But it has evolved into a powerful way to rapidly create games in Flash. With a strong community and plug-ins available it’s the perfect choice to create our game with. In this two part series we’ll explore how Flixel works and build a retro-styled platform game in the process.
Download the tutorial files and look through the source code alongside reading the article, because for the sake of space not all of it can be covered here and we’ve got a lot of ground to cover.
Getting started
For Windows users there is a guide on installing FlashDevelop with Flixel. On Mac OS X you can use Adobe Flash Builder. FlashGameDojo has a tutorial for this. Or run FlashDevelop under Parallels.
Even if you use FlashDevelop / Flash Builder already I’d still recommend following the guides so you become familiar with the Flixel package structure.
Game Design Brief
It helps to have a plan of your game before you start on it. While the plan should never restrict you from iterating your game during development, it will set a base ground on which to build. Here is a concise brief for our game:
“Player controls a chick who can run left/right and jump on platforms across a horizontally scrolling level. The environment is a lush green jungle with trees, grass, flowers and ruins to explore. There will be static and moving platforms and stars to collect. Collect enough stars and the level exit opens. Player cannot die by falling unless he hits the water. Animal baddies move around the platforms and are fatal to touch.”
From this brief we can instantly visualise how the game will look and play. This allows us to break the code structure into logical objects such as Player, Map, Star and Enemy. The artist can also create concept sketches to set the style of the game, and provide a point of reference for the pixel art.

Concept Sketches These help set a visual style for the game, introduce main characters and act as a reference for the pixel art.
It starts with FlxGame
Open Main.as from the “Part 1” source folder:
[as]
public class Main extends FlxGame
{
public function Main()
{
super(320, 240, PlayState, 2, 60, 60);
forceDebugger = true;
}
}
[/as]
FlxGame is the wrapper for your whole game, setting up Flixel in the process. The call to super sets the resolution of our game (320 x 240), the initial State (PlayState), the zoom level (2) and the frame rates (60 fps).
While 320 x 240 may seem small at a zoom level of 2 it will display at 640 x 480. The up-scaling of retro games is a common trait that helps show-off the detailed pixel art. forceDebugger enables the built-in debugger which is activated by pressing the ‘ key. This lets you view bounding boxes, collision, paths, variables, logs and save out game replays.
Your game can have only one FlxGame class, but it can have many States. States are a way to split your game into logical sections. For example a MainMenuState, a PlayState with the guts of the game and a GameOverState. Only one State can be active at a time.
Getting into a right State
States in Flixel extend FlxState and they are the guts of your game. When the State is initialised it calls the function create. This is used to construct any assets or variables the game needs. Once your game is running Flixel calls the update function every frame. In Flash terms it’s the equivalent of an Enter Frame event. Here is where you handle anything that needs to happen continuously. We’ll use it to detect collision between game objects.
Inside the create function we make two types of object: the Player sprite and some platforms.
[as]
player = new Player(32, 100);
floor = new FlxTileblock(0, 208, 320, 32);
floor.makeGraphic(320, 32, 0xff689c16);
add(player);
add(floor);
[/as]
The floor variable is one such platform. Although we’ll replace it in the final game it’s a great rapid way to provide objects the player can jump on to test the physics. The objects are then added to the State, allowing Flixel to draw them when it renders the scene. It’s similar to addChild in native Flash and the order in which you add defines how they are drawn.
All player specific code is held in the Player class, represented here through the player variable. This keeps it organised and easy to re-use. Before we start that however we need to give our player some wings – quite literally – by preparing the sprite sheet.
Meet Nutmeg
The hero of our game is a chick called Nutmeg. We know from the brief he can run, jump and get hurt. Based on this our artist created a sprite sheet contains all the frames for animation laid out next to each other on a fixed width grid.
Flixel can automatically create reversed frames so we only draw him facing right. The first frame is an idle pose. Frames 2 and 3 are the walk cycle, and frame 4 is a hurt expression. If you are more comfortable animating inside of Flash Professional then you can create a timeline sequence as usual, export it to a SWF and use a tool such as Grant Skinners Zoë (http://easeljs.com/zoe.html) to convert it to a sprite sheet.
Sprites in Flixel are called FlxSprite which is what our Player extends. These differ from regular Flash Sprites in that as well as graphics data they contain extra values to allow you to easily control physics, animation, direction, collision and rotation. Inside Player.as we’ve embedded the sprite sheet:
[as][Embed(source = ‘../assets/player.png’)] private var playerPNG:Class;[/as]
And then tell FlxSprite to use it:
[as]loadGraphic(playerPNG, true, true, 16, 18, true);[/as]
This tells Flixel to chop the sheet into 16×18 frames and create reversed versions. Animation works in a similar way to Flash MovieClips.
[as]addAnimation(“walk”, [0, 1, 0, 2], 10, true);[/as]
This creates a new animation sequence called “walk” which cycles through frames 0, 1, 0, 2 at a rate of 10 frames per second. The true parameter makes it loop. To play an animation you use its label:
[as]play(“walk”);[/as]
What goes up must come down
Making the player sprite run and jump smoothly provides us with a great opportunity to explore ones of Flixels strengths: its plug-ins. Much like with WordPress and Drupal, the Flixel community release plug-ins which extend the framework further and ultimately save you time.
One such plug-in is FlxControl which is part of the Flixel Power Tools. They are included in the tutorial zips but are constantly updated, so check https://github.com/photonstorm/Flixel-Power-Tools for updates. If downloading fresh there is a Getting Started guide in the Docs folder.
The plug-in needs to be activated and assigned to our player FlxSprite:
[as]
if (FlxG.getPlugin(FlxControl) == null) {
FlxG.addPlugin(new FlxControl);
}
FlxControl.create(this, FlxControlHandler.MOVEMENT_ACCELERATES, FlxControlHandler.STOPPING_DECELERATES, 1, true, false);
[/as]
The parameters tell it that we want the sprite to accelerate and decelerate. If we didn’t pick this the sprite would start and stop immediately making the experience very abrupt.
[as]
FlxControl.player1.setCursorControl(false, false, true, true);
FlxControl.player1.setJumpButton(“SPACE”, FlxControlHandler.KEYMODE_PRESSED, 200, FlxObject.FLOOR, 250, 200);
FlxControl.player1.setMovementSpeed(400, 0, 100, 200, 400, 0);
FlxControl.player1.setGravity(0, 400);
[/as]
This enables cursor control for the left and right keys, and sets SPACE BAR to be the jump button. The player can only jump if on the floor and will try to jump to a height of 200 pixels. setMovementSpeed allows the sprite to accelerate at 400px/sec up to top speed of 100px/sec. Modify these values to much lower or higher numbers to see the effect! Finally we set some gravity, pulling the player back down to earth. Try changing the gravity value to make the player float or drop like a lead balloon. The best thing you can do to learn about Flixel and its plug-ins is to mess around with them. You never know what might come out of it! I’ve seen whole game ideas born from what were code bugs, so it pays to experiment.
Putting it all together
Run the code at this point and you’ll see we have a cute little chick sprite who can run and leap around at will. It collides smoothly with the ground, and there’s even a platform to leap on. If you press the debug key (‘) you can watch the physics values in real-time. Click the box icon in the top right to turn on the visual outlines.
Granted it isn’t quite Mario, but we’re not finished just yet.
Building a Level Map with DAME
Green blocks are all well and good, but we need a proper level for the player to explore. Flixel has built-in support for Tile Maps which are an efficient and fast way to construct game levels. Tile Maps work by using Tile Set – a series of tiles aligned to a fixed-size grid. Here is the Tile Set created for our game:
Each tile is 16×16 pixels in size, and you can see that some of them join together to form game objects such as the platform in the bottom right. The organisation of the Tile Set is up to you (or your artist!), but it’s sensible to leave big chunks of empty tiles should you need to insert new tiles later on in development. Tiles are separated into two types: Tiles you can collide with, and tiles you never collide with. In Flixel this is determined by the tile number and is called the Collide Index. Every tile after the index is treated as a tile you collide with. In our Tile Set you’ll see on the top row items such as flowers, bushes and shrubs. These are all non-colliding tiles, as we don’t want our player getting stuck on flowers.
With our Tile Set created we now need to design the level. To do this we use a Tile Map Editor. For this tutorial we’ll use an editor called DAME. Although the interface takes some getting used-to, the actual map view in DAME is rendered directly with Flixel so you know for sure that what you see in the editor is how it appears in game.
DAME can be downloaded from http://dambots.com/dame-editor/ and works on Windows, OS X and Linux. Create 3 map layers in DAME, one for the Sky background, one for the level itself and one for the stars which the player can collect. You can find our DAME maps by downloading the tutorial files and looking in “Nutmeg Part 2 – The Map”. With the Map Layer selected click on a tile in the Tile window and then paint with it, just like an art package:
Once you are happy with the design of your level you can export the map data to a CSV file from the File – Export menu.
Lights, Camera, Action
Add a new class to the project called Level1 that extends FlxGroup. This is Flixel’s way of grouping display objects together and keeps our code logical and structured. We can also check for collision against a whole group, which is significantly faster than checking every element individually. Our map is held in a local variable:
[as]
map = new FlxTilemap;
map.loadMap(new mapCSV, mapTilesPNG, 16, 16, 0, 0, 1, 31);
add(map);
[/as]
loadMap takes our CSV map data exported from DAME, and an embedded Tile Set png and creates a Tile Map object which is then added to the group. The same process is repeated for the Sky background.
Back in the PlayState we add the level to the display. But before we can unleash the player we tell Flixel’s camera system to follow them around and restrict the camera to the map boundary:
[as]
FlxG.camera.setBounds(0, 0, level.width, level.height);
FlxG.camera.follow(player, FlxCamera.STYLE_PLATFORMER);
[/as]
The last task is to add a collision check into the PlayState update function:
[as]FlxG.collide(player, level);[/as]
With the map loaded, the camera set and collision running we can now test the game. The chick now happily bounces around the level, landing on platforms and not colliding with flowers.
Sprinkling a little stardust
Now we’ve a pretty landscape to traverse we’ll add stars for the player to collect, and display the total collected as a score in the game. Flixel has a text function called FlxText which we use to display the score:
[as]
score = new FlxText(0, 0, 100);
score.scrollFactor.x = 0;
score.scrollFactor.y = 0;
[/as]
The score is added at the top left of the screen and has a scrollFactor of zero. This means the text will be locked in place at the coordinates given, and not scroll around as the camera moves.
In the DAME map the Stars layer was exported to a CSV file and we’ll use this map data to create Star sprites. The function parseStars in the Level1 class works by looping through the CSV map data, and for every tile it creates a new Star sprite at those coordinates. All of these sprites are added to an FlxGroup called stars. In the PlayState update function we check to see if the player is colliding with a star:
[as]FlxG.overlap(player, level.stars, hitStar);[/as]
If a collision occurs this will call the function hitStar, passing in the two objects that collided, in this case the player and the star he hit. The star is removed from the game and the score increased:
[as]
star.kill();
FlxG.score += 1;
score.text = FlxG.score.toString() + ” / ” + level.totalStars.toString();
[/as]
Finally the score text is updated to show them how many stars they’ve collected, and how many are left. With this one small addition we’ve now got a real playable game with an objective – collect all stars:
In part 2 we will introduce baddies for you to avoid, sound effects, a user interface (HUD) and Game Over sequence. If you feel inspired to build your own games be sure to visit http://flixel.org which is home to a vibrant developer community. You’ll also find stacks of Flixel related tutorials at http://www.photonstorm.com along with the Flixel Power Tools plug-ins. Finally for reference to the classic games of old http://www.retrogamingtimes.com is well worth a visit.
The following 2 parts were the “box-outs” that appeared in the print article. I’ve included them here because they’re interesting 🙂
Adam Saltsman talks about why he created Flixel
I guess it was around 7 years ago that I tried to make a little “game engine”, something that would allow me to make Super NES style games. It just seemed like a fun thing to do. After a few abortive attempts in C++ / Python / Java I finally settled on AS3. It was the pixel-level stuff in it that really interested me. However I’d grown very cautious about “engine building” and not actually making any games. So I stuck with AS3 and created game after game, and noticed which patterns evolved. The games kept getting more complex, and re-used code from previous projects, and eventually those parts I was seeing in every project got moved to their own folder. I think a lot (if not most) developers have a similar folder somewhere, just a pile of “really handy” code.
Originally this was just for me, something I’d use to sketch new game designs in. But it wasn’t long before I thought that with a little polish here and there I might be able to release it publicly. Turns out it needed a lot of polish (and still does), but I really like where it’s going. Lately I have been thinking a lot about how to “make stuff that matters”, which is a very loose idea, but something I obsess over, for better or worse. I think Flixel is a cool thing. It’s not really “art” in and of itself, but it contributes to the cultural food chain, and that makes me feel like a hero.
Eventually it would be great to add official support for a physics engine like Nape, and port it over to Molehill, the hardware-accelerated Flash Player by the end of the year. I am very hesitant to ever add game-specific features to the framework, but these all seem like good general systems and will just make making games easier and more fun.
At the risk of leaving out something awesome I would say the following games are shining examples of Flixel in action:
Canabalt
Station 38
Tuper Tario Tros
Cat Astro Phi

Cat Astro Phi Designed to look, sound and feel like a Gameboy Classic title it's a good example of what Flixel is capable of.
Pushing Pixels
Mastering the style of pixel art
Professional pixel artist Ilija Melentijevic explains how he created the artwork for Nutmeg:
Pixel art is a time-consuming but rewarding approach to creating game graphics. If you have little screen space such as on a mobile device, or are simply looking for that charm and precision it offers, then it’s worth making the extra effort. Also, it’s incredibly fun!
It’s a good idea to start from the big picture. First make a mock-up of a game scene, defining the style, colours, characters, etc. Once you have such solid foundation it’s easy to turn it into actual game assets. Your art must fit and enhance the game, not just look nice on its own, so make sure everything reads well and speaks to the player in a consistent way. In a busy shooter, use colours to separate bullets from power-ups, or to make the foreground objects pop out. Immersion is a priority in any game, and understanding what’s going on plays a big part in this. Fire up your favourite games and look how the pros do it.
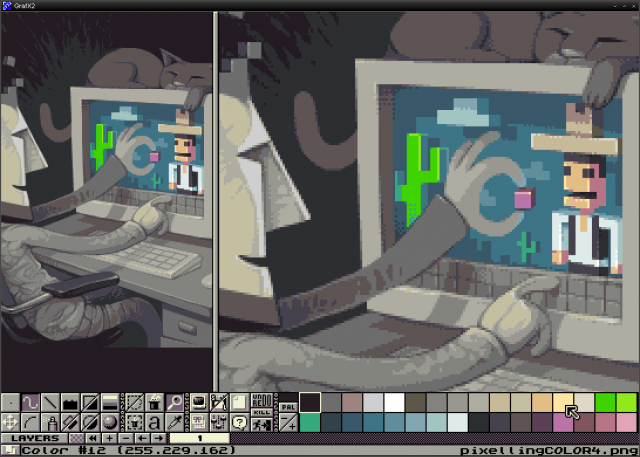
There are a number of tools you can use and they vary widely. Some people even use Microsoft Paint! Many professionals use Photoshop and it certainly gets the job done, but I prefer a dedicated pixel-oriented program. Closest to the industry standard is Cosmigo Promotion which boasts an impressive set of features and will look familiar to Photoshop users. My personal favourite is the 100% free GraFX2. Currently it lacks animation, but otherwise provides for an unparalleled workflow and ease of use.
Make sure you join an active pixel art community that will provide both feedback and motivation. PixelJoint lets you comment, rate and vote on other people’s work, submit your own, and even take part in weekly challenges, perhaps the best way to hone your skills.
For a less casual approach consider Pixelation, a community focused on pushing the medium forward. Here you’ll find discussions on theory, game art analysis, collaborations and more. Many masters of the form frequent the forum, so it’s a great place to post your work to get some constructive critique.
View Ilija’s artwork at http://www.photonstorm.com/topics/art
Posted on September 15th 2011 at 2:16 pm by Rich.
View more posts in Flash Game Dev Tips. Follow responses via the RSS 2.0 feed.
Make yourself heard
Hire Us
All about Photon Storm and our
HTML5 game development services
Recent Posts
OurGames
Filter our Content
- ActionScript3
- Art
- Cool Links
- Demoscene
- Flash Game Dev Tips
- Game Development
- Gaming
- Geek Shopping
- HTML5
- In the Media
- Phaser
- Phaser 3
- Projects
Brain Food


